Last updated: August 13, 2026
Choosing the best coffee percolator involves fewer features than any other coffee maker on your counter, because a percolator barely has any. It is a pot, a basket, a stem, and a lid with a glass knob. What separates a good one from a frustrating one is three questions: where you heat it, what it is made of, and how well the basket sits on the stem.
This guide sorts the category the way a buyer should: stovetop versus electric first, then material and induction compatibility, then the build details that decide whether you get a clean cup or a mouthful of grounds. It also explains how percolation works and why it produces the strong old-fashioned cup some people love and others dislike.
This article contains affiliate links. If you buy through them, we may earn a commission at no extra cost to you. Learn more.
Quick Answer
Which coffee percolator should you buy?
- For most homes, a stainless steel stovetop percolator is the versatile choice: it works on gas, travels to the campsite, and still brews when the power is out.
- For counter use and serving a group, an electric percolator brews on its own and keeps the pot warm afterward, which a stovetop model cannot do.
- If you cook on induction, check for a magnetic stainless base. Aluminum and glass percolators generally will not work at all.
What to Check Before You Buy a Percolator
Start with heat source and material, because those two decisions rule out most of the market before you compare anything else. Everything after that is build quality: how the basket meets the stem, how the handle survives a burner, whether the lid stays put.
| What to check | Why it matters | What to look for |
|---|---|---|
| Stovetop or electric | Sets where you brew and whether the pot holds heat | Stovetop for gas, camping, outages; electric for hands-off brewing |
| Material | Drives durability and induction compatibility | Stainless all-round, enamel for camp; aluminum and glass more limited |
| Induction compatibility | Induction hobs heat magnetic metal only | A flat magnetic base, stated induction ready |
| Capacity in cups | A percolator cup is far smaller than a mug | Size up; an eight cup pot often fills two or three mugs |
| Basket and stem fit | Poor fit lets grounds reach your cup | A basket seating squarely, a snug lid, fine perforations |
| Handle and lid | The pot gets hot and a loose lid shifts mid-pour | A stay cool handle, a latching lid, a readable glass knob |
| Keep warm function | Only electric models offer it | An automatic switch to warming after brewing |
| Cleaning | Oils and scale build up inside stem and basket | Parts that fully disassemble, wide openings |
How a Percolator Actually Brews
A percolator recirculates. Water in the bottom chamber heats until it climbs the hollow stem, sprays over the coffee in the basket, drains back through the grounds, and loops again. That repetition is the defining feature of the method, and the reason people either love or avoid it.
Two things follow. The water arriving at the coffee bed sits close to boiling, above the 195 to 205 F (about 91 to 96 C) range commonly recommended for other methods. And the same liquid passes through the same grounds repeatedly, so extraction keeps climbing the longer it runs.
What that means in the cup
The result is a strong, robust, unmistakably old-fashioned cup with plenty of body and little of the delicate fruit or floral character pour over drinkers chase. Many people find that comforting and familiar, which is much of the appeal.
The flip side is real: percolate too long and the brew tips into harsh, bitter territory, because nothing stops the cycle for you on a stovetop model. Control comes from you, which is why grind and timing matter more here than with a drip machine.
Stovetop, Electric, or Induction Ready
Pick the format around your kitchen and habits. Stovetop percolators are the flexible option: gas burners, camp stoves, and any power outage you live through. They also carry the nostalgia, since this is the shape most people picture when they hear the word percolator.
Electric percolators plug in, run their own cycle, and switch to warming when they finish. For a household that drinks a pot over an hour, or for hosting, that keep warm function is the whole argument. The trade-off is a cord, a fixed spot on the counter, and another appliance that can fail.
The induction caveat
Induction hobs heat magnetic metal only, so an aluminum or glass percolator will not respond on one. If you cook on induction, look for stainless steel with a flat, magnetic base and a maker who says induction ready in plain language. A fridge magnet on the base tells you the same thing.
Material, taste, and plastic
Stainless steel is the safe default: durable, taste neutral, usually induction compatible. Enameled steel is the classic camping material, though the coating chips. Aluminum heats fast but fails on induction, and glass is fragile. One quiet advantage of the category: a stovetop percolator has essentially no plastic touching hot water, which appeals to readers of our plastic-free coffee maker guide.
Our Top Picks at a Glance
How we chose: we compared widely available percolators on heat source, material, induction compatibility, capacity, and the build details owners mention most, especially basket fit and handle comfort. Selections lean on manufacturer specifications and recurring themes in owner reviews rather than any hands-on trial of our own.
One reassurance: none of these are complicated machines. The differences below are about where and how much you brew.
🏆 Best Overall
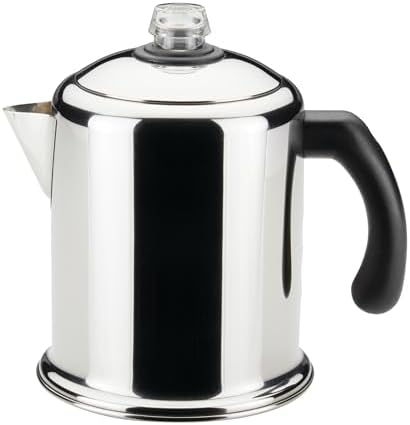
A classic stainless steel stovetop percolator in a mid-size capacity, the format that suits the widest range of kitchens. Stainless means it is generally induction friendly, easy to clean, and rugged enough for camping.
🔌 Best Electric
The counter option for households that finish a pot slowly or brew for guests. It runs its own cycle and then holds the coffee warm, the one thing a stovetop percolator cannot do on its own.

💰 Best Budget Pick
A smaller stainless stovetop pot with the traditional glass knob, so you can watch the brew and pull it off the heat at the right moment. A sensible first percolator for one or two drinkers.

Picks for the Campsite and the Induction Hob
Two situations deserve their own answer, because the wrong pot fails outright in both. Camping asks for stability and heat tolerance; induction asks for a specific base material.
🔥 Best for Camping
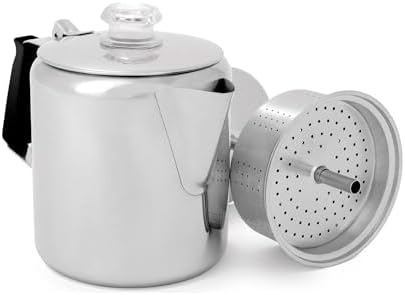
A rugged stainless pot built for a camp stove or an open fire, with a silicone wrapped handle meant to stay manageable over the flame. Simplicity is the feature: no cord, no electronics, nothing to fail far from a socket.
⭐ Best for Induction
Stainless construction with a flat magnetic base, the only way a percolator works on an induction cooktop. Confirm the listing states induction compatibility rather than assuming it from the word stainless, since some blends are not magnetic.

Getting a Good Cup Out of It
Grind and timing carry almost all the weight. Use a coarse grind, coarser than you would for drip, because anything finer slips through the basket perforations and finishes in your cup as sludge. Coarse also slows extraction, which helps in a brewer that keeps re-extracting the same bed.
For timing, a common starting point is roughly 7 to 10 minutes of active percolating once the pot begins to cycle, then off the heat. Drop the burner to low as soon as the perking starts, so the pot gurgles in a steady rhythm instead of a frantic one. That sound and the color in the glass knob are your only gauges, and they work well once you know your pot.
Cleaning and descaling
Rinse the basket and stem right after brewing while they are warm, because coffee oils set into the perforations and turn stale. Every few weeks, take the assembly apart and wash it thoroughly.
Hard water leaves scale inside the stem and on the base, which slows the cycle and eventually blocks it. A periodic vinegar run clears it, using the method in our guide to cleaning a coffee maker with vinegar. Electric models need it more often, since scale gathers at the heating element.
Common Mistakes to Avoid
- Using a drip grind. Fine grounds wash straight through the basket. Coarse is not a preference here, it keeps sediment out of the cup.
- Percolating until it smells done. By the time the aroma fills the kitchen, the pot has often gone too far. Watch the clock, not your nose.
- Buying by the cup rating. A pot rated for several cups may fill only a couple of mugs. Size up.
- Leaving the basket in afterward. The grounds keep dripping and the coffee keeps getting stronger. Lift the basket and stem out once the pot comes off the heat.
- Assuming stainless means induction ready. Some stainless blends are not magnetic. Check the base before you order.
Where to Go From Here
A percolator is not the right brewer for everyone. If you want clarity, sweetness, and the ability to taste where a coffee came from, the method works against you, and a brewer from our pour over coffee maker guide serves you better. If you want that classic pot without standing over a burner, a machine from the best drip coffee makers gives similar volume with automatic timing.
If the concentrated end of the flavor spectrum is what draws you here, look at the moka pot instead, which produces something more intense in a smaller cup, as explained in our guide to Cuban coffee in a moka pot. And if budget is the real constraint, the roundup of coffee machines under 100 covers what that tier buys across several brewing styles.
Frequently Asked Questions
How long should you percolate coffee? A commonly recommended starting point is around 7 to 10 minutes of active percolating, then off the heat. Shorter gives a lighter cup, longer pushes toward bitter, so adjust once and stick with it.
What grind size does a percolator need? Coarse, noticeably coarser than drip. Finer grounds pass through the basket perforations and end up as sediment, which is the most common complaint about the method.
Does a percolator make stronger coffee than drip? Generally yes, because the water arrives close to boiling and passes through the grounds repeatedly instead of once. That is why the cup reads bolder than a comparable batch from a drip machine.
Can you use a percolator on an induction cooktop? Only if it has a magnetic stainless base. Aluminum, glass, and non-magnetic stainless will not heat on induction, so check the base with a magnet or read the listing carefully.
Stovetop or electric percolator, which is better? Neither overall. Stovetop wins on flexibility, camping, and power outages; electric wins on hands-off brewing and keeping the pot warm afterward.
The Bottom Line
For most people the answer is a stainless steel stovetop pot, sized generously, that works on whatever hob you own and travels when you do. Choose electric if hands-off brewing and a warm pot matter more than portability, and check for a magnetic base if you cook on induction. Then use a coarse grind and watch the clock.