Last updated: June 25, 2026
A coffee scale is the cheapest upgrade that changes every cup you make, and it is the one most people skip. New beans, a better grinder, a fancier kettle: all of that helps, but none of it helps repeatably until you know exactly how much coffee and how much water went into the brew. Scoops vary, beans differ in density, and a heaping tablespoon on Monday is not a heaping tablespoon on Thursday. Weight is the only measurement that stays honest.
What follows is a practical sort of the category: which resolution you need for espresso versus filter coffee, why a built-in timer matters more than it sounds, how response speed and auto-off can quietly ruin a pour, and which shape fits under a dripper or on a drip tray. Then five picks, covering the everyday choice, the budget option, the upgrade, and two specialist cases.
This article contains affiliate links. If you buy through them, we may earn a commission at no extra cost to you. Learn more.
Quick Answer
Which coffee scale should you buy?
- For espresso, look for 0.1 g resolution and a footprint small enough to sit on the drip tray. For pour over, French press, and cold brew, 1 g resolution is plenty.
- A built-in timer is the feature you will use every single day, because brew time and weight belong on the same display.
- Check the auto-off behavior and the surface. A scale that shuts down mid bloom, or that dies from one splash, is a daily annoyance.
What to Look For in a Coffee Scale
Most of this category looks identical in photos, so the differences that matter are buried in the spec list and in owner comments. These are the six that decide whether a scale becomes part of your routine or ends up in a drawer.
| What to check | Why it matters | What to look for |
|---|---|---|
| Resolution | Espresso doses live in tenths of a gram, filter brewing does not | 0.1 g for espresso and precise dosing; 1 g is fine for pour over, French press, and cold brew |
| Built-in timer | Brew time and weight are the two numbers you track together | A timer on the same display, ideally one you can start with one hand mid pour |
| Response speed | A laggy readout makes you overshoot the pour | Owner reviews that mention the display keeping up with a steady stream of water |
| Water resistance | Coffee stations are wet places | A sealed or splash-resistant top surface, silicone pad, and buttons that are not open seams |
| Size and shape | The scale has to fit where you actually brew | Wide enough for a dripper and server, low and compact enough for an espresso drip tray |
| Power and auto-off | An early shutdown mid brew is the most common complaint in this category | USB-C rechargeable or common batteries, plus an auto-off you can disable or that waits long enough |
If you are building the pour over station around the scale, the two companions worth getting right are covered in our guides to the best pour over coffee makers and the best gooseneck kettles.
Why Weighing Beats Scooping
The reason a scale changes your coffee is that it turns a vague recipe into a repeatable one. Coffee beans vary in density by roast level and origin, so a scoop of light roast and a scoop of dark roast are not the same amount of coffee. Once you weigh both the dose and the water, you have a ratio you can write down, repeat tomorrow, and adjust deliberately.
Ratios are a starting point, not a law
Many people start around 1:15 to 1:17 for pour over, meaning roughly 15 to 17 grams of water for every gram of coffee, and adjust from there to taste. Immersion methods like French press are commonly brewed a little stronger, and espresso is usually described as a ratio of dry dose to liquid out in the cup. None of these are rules, and plenty of excellent coffee sits outside them. The point of the scale is that once you find the ratio you like, you can hit it again on purpose. Our walkthrough of how to use a French press shows how the same logic applies to immersion brewing.
The grinder and the scale work as a pair
Weighing removes one variable so you can read the others. If your dose is fixed and the water is fixed, then a change in taste points at the grind, and you can act on it with confidence. That is exactly why a scale pays for itself faster than most gear: it makes every other upgrade legible. If the grinder is your next step, the manual grinder roundup covers the options that hold a setting.
Espresso Needs 0.1 g, Filter Coffee Does Not
Resolution is where the two halves of this category split. An espresso dose is small, and a few tenths of a gram is a real difference in how the puck extracts, which is why serious espresso scales read to 0.1 g. On the filter side you weigh tens or hundreds of grams, so a single gram disappears into the noise. A 1 g scale is adequate for pour over, French press, and cold brew.
There is a practical catch with espresso scales beyond resolution: the thing has to fit. Drip trays are shallow and narrow, and many general purpose kitchen scales are too tall to leave room for a cup underneath the portafilter. Look for a low-profile body and a small footprint, and check whether the display stays visible with a cup on top. If you are dialing in shots, a scale pairs naturally with a properly sized espresso tamper, since both exist to keep your variables still.
Our Top Picks at a Glance
How we chose: we compared widely available coffee scales on resolution, timer design, response speed, water resistance, physical footprint, and the complaints that repeat across owner reviews. Selections lean on manufacturer specifications and recurring themes in owner feedback rather than any hands-on trial of our own.
One reassurance before the list: every scale here has a built-in timer, because a coffee scale without one is just a kitchen scale. Beyond that, the differences are about precision, build, and where the scale has to sit.
🏆 Best Overall
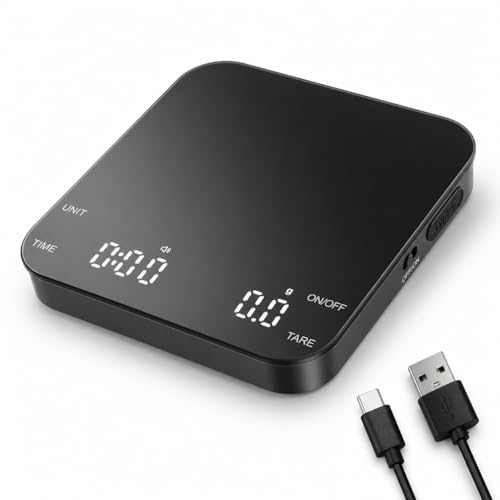
The Timemore Black Mirror is the scale most home brewers end up recommending: 0.1 g resolution, a built-in timer, USB-C charging, and a slim body with a coated top that shrugs off drips. It is precise enough for espresso and large enough for a dripper, which is why it covers most kitchens on its own.
💲 Best Budget Pick
The Greater Goods digital coffee scale keeps the two things that matter, accurate weighing and an integrated timer, and skips the extras. A sensible first scale if you brew filter coffee and want to stop guessing without spending much. Owners regularly mention how straightforward the controls are.

⭐ Upgrade Pick
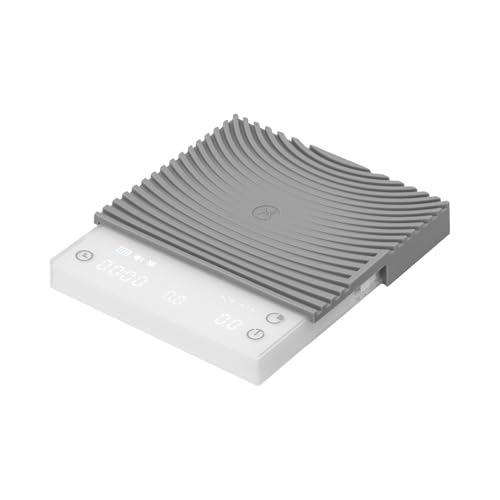
The Fellow Tally Pro sits at the premium end without losing the plot: a fast, stable readout, a brew assist mode that walks you through a ratio, 0.1 g accuracy, and a build that feels designed rather than assembled. Overkill for casual brewing, genuinely useful if you chase repeatability.

Picks by Method: Pour Over and Espresso
The three above suit most people, but two situations reward a purpose-built scale. If you brew almost exclusively by hand, or almost exclusively on an espresso machine, these are the shapes that fit the job.
💧 Best for Pour Over
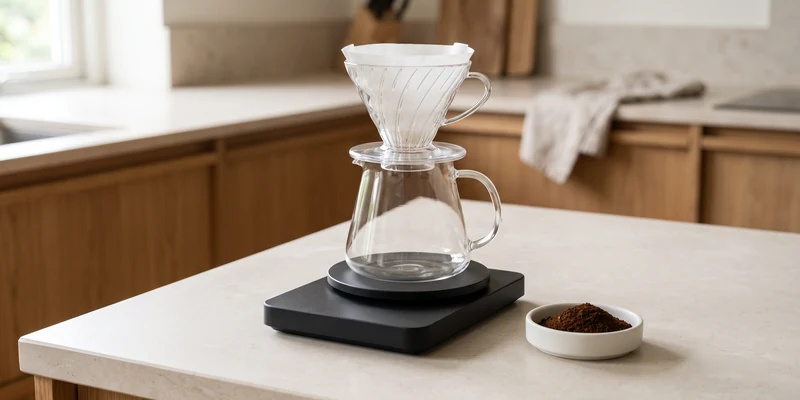
The Hario V60 drip scale is built around the ritual it is named for: a platform wide enough for a dripper and server, a simple timer that starts with the pour, and a flat top that is easy to wipe down. If your routine is a cone, a filter, and a gooseneck kettle, this is the natural companion.

☕ Best for Espresso
A compact 0.1 g scale with a low-profile body designed to sit on a drip tray with a cup on top. Look for a small footprint, a display that stays readable at an angle, and an auto-off you can disable so it does not quit halfway through a shot. Splash resistance matters here more than anywhere else.
Using a Scale Without Fighting It
Weighing takes about ten extra seconds once the habit sets in, and most of the friction people report comes from avoidable things. Put the empty vessel on the scale, tare it, add the coffee, note the dose, tare again, then start the timer as the first water hits. That single sequence covers pour over, French press, and cold brew.
Small habits that keep readings honest
Set the scale on a flat, solid surface, because a soft mat or an uneven counter makes the reading drift. Keep the top clean and dry, since dried coffee under a corner can affect the load cells. If the auto-off keeps firing during a long bloom, check the manual for a way to extend or disable it before you assume the scale is faulty.
Cold brew and big batches
Large-format brewing is where a scale saves the most time, because you are scaling a ratio rather than counting scoops into a pitcher. Weigh the coffee, weigh the water, note the numbers, and your next batch is a copy of the one you liked. Our roundup of the best cold brew coffee makers covers the vessels that make this easiest.
Common Mistakes to Avoid
- Buying 1 g resolution for espresso. Small doses need tenths of a gram. If espresso is your main brew method, treat 0.1 g as a requirement, not a nice extra.
- Ignoring the footprint. A scale that will not fit on the drip tray or under the dripper is a scale you stop using. Measure the space before you order.
- Overlooking auto-off. Shutting down mid bloom is the single most reported irritation in this category. Check whether the timeout is long enough or can be turned off.
- Treating a ratio as a rule. A starting range is a place to begin, not a target to defend. Adjust to your taste and to the coffee in front of you.
- Weighing on a soft or uneven surface. Silicone mats, trivets, and wobbly counters all make readings drift. Flat and solid is the fix.
- Leaving it wet. Even a splash-resistant scale prefers a dry wipe after brewing. Standing water around the buttons is how these units eventually fail.
Where to Go From Here
Grind consistency is the biggest lever in the whole setup, so if you are still on a basic grinder, the best manual coffee grinders guide explains what actually changes. For hand brewing, a controlled pour and a steady dose are the whole game, which the gooseneck kettle roundup and the pour over guide cover from both sides. On the espresso side, the scale and the tamper do the same job from different angles: they hold your variables still so a grind adjustment tells you something. And if immersion is your everyday method, how to use a French press puts the ratio into a routine.
Frequently Asked Questions
Do I really need a coffee scale? You do not need one to make coffee, but you do need one to make the same coffee twice. Weighing the dose and the water turns a vague recipe into something you can repeat and adjust deliberately.
Is 0.1 g resolution necessary? For espresso, yes, because doses are small and tenths of a gram matter. For pour over, French press, and cold brew, 1 g resolution is perfectly adequate.
What coffee to water ratio should I start with? Many people start around 1:15 to 1:17 for pour over and adjust to taste from there. Immersion methods are often brewed a little stronger. Treat these as starting points rather than fixed rules.
Can I use a kitchen scale instead? You can, especially for filter brewing, as long as it reads quickly and you time separately. The reasons to buy a coffee scale are the built-in timer, the faster response, and a footprint that fits a dripper or a drip tray.
Will a coffee scale fit on my espresso machine? Only if it is low profile and small enough for your drip tray with a cup on top. Measure the tray, and check owner comments about display visibility at an angle before ordering.
Are rechargeable scales better than battery ones? USB-C charging avoids a drawer full of batteries, but a scale taking common batteries is easy to revive anywhere. Either works; response speed and a sensible auto-off matter more.
The Bottom Line
Buy for resolution and fit: 0.1 g and a low-profile body if espresso is your main method, 1 g and a wide platform if you brew by hand. A built-in timer, a fast readout, and an auto-off that does not quit mid bloom are the three details that decide whether the scale stays on the counter. Beyond that, the value is not precision for its own sake, it is being able to repeat the cup you liked.