Last updated: August 13, 2026
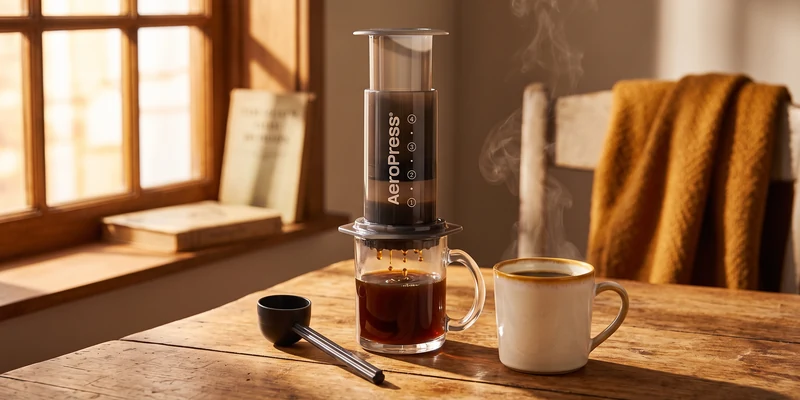
Few brewers have as much goodwill behind them as AeroPress coffee makers, and few are as easy to overthink. Competing recipes, inverted setups, timers, and filter debates make a very simple plunger feel like a hobby with an entrance exam. It is not. The AeroPress is a small immersion brewer with a bit of pressure at the end, and the hardest part of owning one is deciding which version belongs on your counter.
This guide sorts that out: the current lineup side by side, what actually happens inside the chamber, grind, ratio, and temperature as starting ranges rather than commandments, and then the version that fits each kind of coffee drinker.
This article contains affiliate links. If you buy through them, we may earn a commission at no extra cost to you. Learn more.
Quick Answer
Which AeroPress should you buy?
- For most people the AeroPress Original is the one to buy: the version every recipe is written for, and it does everything the others do.
- Choose the AeroPress Go if you travel, commute, or camp, since it is the smaller version that nests into its own cup.
- Choose the AeroPress XL if one mug is never enough, because it brews a noticeably larger batch in a single press.
The AeroPress Lineup Side by Side
All four versions brew the same way, so the differences come down to size, materials, and looks rather than technique. Seeing them next to each other is usually enough to settle the choice.
| Model | Best for | What sets it apart | Keep in mind |
|---|---|---|---|
| AeroPress Original | Everyday home brewing | The standard size every recipe is built around, with the widest accessory support | Bulkier than the Go in a carry-on |
| AeroPress Go | Travel, office, camping | Packs inside its own drinking mug with a lid | Smaller volume, so big-mug drinkers press twice |
| AeroPress XL | Two cups or one large mug | A taller chamber that brews a bigger batch in one go, sold with a carafe | More counter space, and more coffee per brew |
| AeroPress Clear | Watching the brew, kitchen looks | A transparent chamber in the same size and shape as the Original | Brews like the Original, so it is a looks and materials choice |
Two things stay constant: every version uses the same paper filters and the same plunge motion, and every version cleans up in seconds, which is why so many people keep one at work. If you want that simplicity in a format that makes a full pot, our pour over coffee maker guide covers the obvious alternative.
How an AeroPress Actually Brews
An AeroPress is an immersion brewer with a pressure finish. Coffee and water steep together in a sealed chamber, then the plunger forces the brew through a filter into your cup. That combination is why the result tastes different from a French press, which is pure immersion, and a pour over, which is pure percolation.
Paper or metal filter
The paper discs in the box catch most of the oils and fine particles, giving a clean cup with almost no sediment. Reusable metal filters, sold separately, let more of those oils through for a heavier texture that some drinkers prefer and others find muddy. Neither is correct: owners who value clarity stay with paper, while owners tired of restocking move to metal.
Standard or inverted method
In the standard method the brewer sits on your cup while it steeps, and a little coffee drips through along the way. In the inverted method you assemble it upside down so nothing escapes, then flip it onto the cup before plunging. Inverted gives full control of the steep, but it means flipping a chamber of hot liquid, worth practicing over a sink. Both produce excellent coffee, so treat it as preference rather than doctrine.
Why people pick one over other brewers
The appeal is practical. It forgives imprecise technique, brews in a couple of minutes, ejects a dry puck into the trash, and is nearly unbreakable. Next to the ritual of a French press, it is the low-effort option that still rewards attention.
Grind, Ratio, and Water Temperature: Sensible Starting Ranges
There is no single correct AeroPress recipe, which is precisely why the internet argues about it. What experienced brewers do agree on is a set of workable starting points you adjust to taste.
Grind size
A medium fine grind is the commonly recommended starting point: finer than pour over, but usually coarser than espresso. Go finer for more extraction and a heavier plunge, coarser for a lighter cup. Because steep times here are short, grind quality matters more than most people expect, and a burr grinder makes a bigger difference than any recipe tweak. Our roundup of the best manual coffee grinders covers the hand grinders that pair naturally with this brewer, including travel models that fit the same bag as an AeroPress Go.
Ratio and temperature
Many people start around one part coffee to twelve or fifteen parts water, often brewing stronger and diluting afterward. Temperature is where this brewer genuinely differs: many people brew cooler with an AeroPress than with pour over, and the official recipes have long leaned that way. Somewhere below a full boil is a reasonable place to begin, since cooler water tends to soften bitterness when you grind fine. Steep time is just as flexible, with common recipes running from well under a minute to a couple of minutes.
Getting repeatable results
If your cup swings from great to disappointing for no obvious reason, the culprit is usually measurement. A coffee scale with a timer covers dose, water, and steep in one device, and while a gooseneck kettle is optional here in a way it is not for pour over, a variable temperature model makes brewing cooler easy to repeat.
Which AeroPress Should You Buy?
How we chose: we compared the lineup on brew volume, portability, materials, accessory compatibility, and the themes that repeat across owner feedback. Because every version brews the same way, these picks are about fit rather than rankings.
🏆 Best Overall
The version almost every recipe, tutorial, and accessory assumes you own. It brews a solid single serving and survives kitchen life better than anything made of glass. Buy this one unless you have a specific reason to size up or down.

🎒 Best for Travel
The compact version, built to pack inside its own mug so the whole kit becomes one small cylinder in a bag. Owners consistently mention it as the thing that made hotel and office coffee tolerable. It brews a smaller volume, which is the trade-off for the size.

🍶 Best for Bigger Batches
The tall version for households where one small cup never ends the conversation. It brews a considerably larger batch in a single press and comes with a carafe, so you can serve two cups without brewing twice.

Two More Picks: Everyday Looks and a Useful Add-On
The three above cover the main decision. These two are for buyers who already know they want the standard size, and for anyone who wants to change how their brewer behaves.
🔍 Best Looking Everyday Pick
The transparent version of the standard brewer, in the same size and shape as the Original. It brews identically, so this is a materials and aesthetics decision: you can watch the plunge, and it looks less like lab equipment on an open shelf. Keep abrasive scrubbers away from the chamber.

🧰 Best Add-On
A reusable metal filter disc that replaces the paper ones. It lets more oils through for a fuller cup and ends the annoyance of running out of filters. Keep the paper discs anyway, since switching between the two is the easiest way to change the character of your coffee.

Living With One: Cleaning, Filters, and Travel
Cleanup is the feature nobody markets hard enough. After plunging, unscrew the cap, push the plunger the rest of the way, and a dry puck of grounds drops into the trash or compost. A rinse of the seal and chamber is all that follows, which is why so many of these end up in offices and campsites.
Keeping filters and parts in good shape
Store paper filters somewhere dry, since damp discs stick together and tear. The rubber plunger seal ages first: over years it can stiffen or loosen, and replacement seals are sold separately, so a leaking brewer is usually repairable. Rinse a metal filter immediately, because coffee oils come off far more easily before they dry.
Packing it for the road
For travel the Go is the obvious pick, since everything nests. An Original still travels well if you keep the plunger inside the chamber and carry filters in a small tin so they stay flat. Add a hand grinder and the kit takes about the space of a water bottle, without the fragility or stovetop requirement of a moka pot or French press.
Common Mistakes to Avoid
- Grinding too fine for the plunge. Espresso-fine coffee locks the plunger and pushes brew back around the seal. If you are leaning hard on it, go coarser first.
- Pouring at a full boil. Many people find the cup harsher at full boil, especially with a fine grind. Letting the kettle rest a moment is the easiest fix in the method.
- Chasing recipes before fixing the grinder. Preground coffee and blade grinders cap how good the cup can get. A burr grinder beats any timing change.
- Overtightening the cap. The filter cap only needs to be snug. Cranking it makes it awkward to remove while hot and does nothing for the brew.
- Assuming inverted is mandatory. The standard method makes excellent coffee with no flipping of hot liquid. Try inverted out of curiosity, not obligation.
Where to Go From Here
If you bought one hoping to replace a cafe espresso habit, read our honest answer first: can the AeroPress make real espresso explains what the concentrated style is and where it falls short. To broaden your brewing instead, the pour over guide and our French press walkthrough cover the methods that pair best with this one. Whichever way you go, a burr grinder changes your coffee most, which makes the manual grinder roundup the natural next stop.
Frequently Asked Questions
What is the difference between the AeroPress Original and the Go? Size and packing, not brewing. The Go is the smaller travel version that nests inside its own mug and brews a smaller volume; the Original is the standard-size brewer every recipe and accessory is built around.
Is the AeroPress XL worth it? It is if one small cup regularly leaves you brewing twice. The XL brews a larger batch in a single press and includes a carafe, at the cost of counter space and more coffee per brew.
What grind size should I use? Medium fine is the commonly recommended starting point, finer than pour over but usually coarser than espresso. Go coarser if the plunge is a struggle, finer if the cup tastes thin. Our grinder guide explains why consistency matters more than the setting number.
Should I use paper or metal filters? Paper gives a cleaner cup with less sediment; metal lets more oils through for a heavier body. Many owners keep both and switch depending on the coffee.
Can an AeroPress make espresso? Not in the technical sense, because espresso depends on pressure a hand plunger cannot reach. It does make a strong, concentrated shot-style coffee that works well in milk drinks, as our AeroPress espresso explainer covers in detail.
The Bottom Line
The AeroPress Original remains the default recommendation: it is the size every recipe assumes and it does everything the other versions do. Pick the Go if your coffee happens away from home, the XL if one cup is never enough, and the Clear if you want the standard brewer in a nicer body. Then put your next upgrade into a burr grinder rather than another brewer.